Showing posts with label Paper Smooches. Show all posts

Friday, 28 March 2014

hey

Paper Smooches:   March Sketch


This is such a brilliant set, for those (awkward to make cards for) teenage boys in your life!

I've used the Teen Routine stamp set and coloured it in using my Promarkers. I've added banners to the top and bottom of my design to tie in with the sketch.


Products used:
Teen Routine Stamp Set - Paper Smooches
Promarkers
Card and paper from stash

You may also like:
    

Saturday, 8 February 2014

Happy Birthday

Less is More Challenge -   One Layer Week 158 Anything Goes!


The Challenge at Less is More this week gave me the chance to try out a new technique, and that was to use my Stampin' Up! Markers with an Aquapainter.

I created an embossed border and stamped my image in to the gap. Using the coordinating stamp I stamped my main image. The borders were just coloured, but I've used an Aquapainter with the main image.

Once I had stamped my sentiment I pierced a border round it.

I quite like the watercolour effect that I got by using my Aquapainter, and will definitely be doing this again!


Products used:
Bordering on Romance Stamp Set - Stampin' Up!
Stampin' Write Markers In Colours 2012-14 - Stampin' Up!
Simply Scored Scoring Tool - Stampin' Up!
Salutations Stamp Set - Paper Smooches
Paper Piercing Pack Essentials - Stampin' Up!
Cardstock from stash

You may also like:
    

Saturday, 16 November 2013

Happy Birthday


We've all got designer paper hidden away in our stash, but when you're making cards with a CAS design its often difficult to incorporate on to your cards.

This week's challenge over at Less Is More is to use designer paper in a CAS way, so I've used mine as a background colour, behind the punched out butterflies on the embossed panel.

The butterfly was stamped and punched out, then glued into the punched aperture. To add a little extra sparkle, I've added a rhinestone to each butterfly.

Using my Stamp-a-ma-jig I stamped my sentiment in to the bottom right hand corner to balance my card.


Products used:
Papillon Potpourri Stamp Set - Stampin' Up!
Salutations Stamp Set - Paper Smooches
Perfect Polka Dots Textured Impressions - Sizzix Stampin' Up!
Rich Razzleberry Stampin' Spot - Stampin' Up!
Basic Black Stampin' Spot - Stampin' Up!
Designer Paper - Creative Memories
Card and Rhinestones from stash

You may also like:
    

Saturday, 9 November 2013

Thanks so much

Less is More Challenge -   One Layer Cards - Thank You

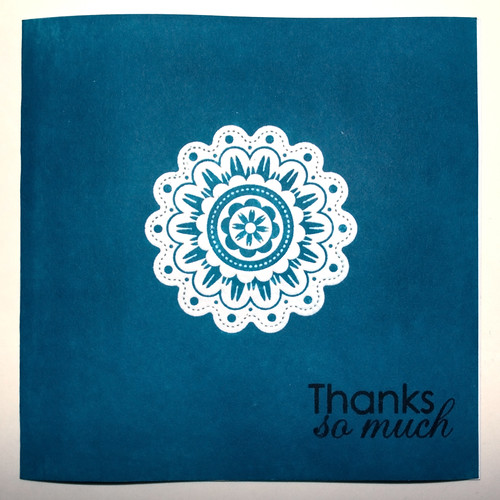
Something new from me today. Trawling round blog land, I keep seeing the phrase "Emboss Resist Technique". Thanks to the wonders of Google and You Tube, I looked this up, then decided to use the technique for my Less Is More One Layer Thank You card. 

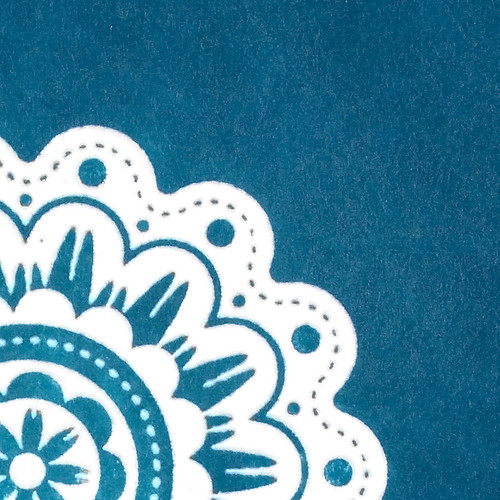
I stamped and clear heat embossed my image on to a white card blank. Using my Marina Mist Ink Spot, I sponged the ink over the entire card.  With a piece of kitchen roll I wiped the excess ink from the embossed image.

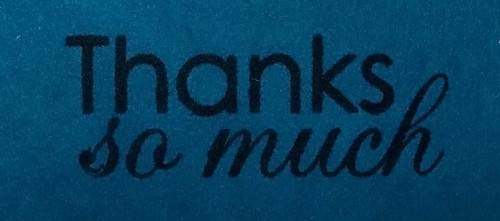
In keeping with the challenge I've used the phrase "Thanks So Much".

Having tried this technique, I'm really impressed with the result it gives. It's something I will definitely use again.


Products used:
Quint-Essential Flower stamp - Stampin' Up!
Marina Mist stampin' spot - Stampin' Up!
Watermark stamp pad - VersaMark
Tuxedo Black ink - Memento
Salutations - Paper Smooches
Clear Embossing Powder - Funstamps

Monday, 28 October 2013

Happy Birthday

Less is More Challenge - Recipe Week 143: String or Twine


This weeks challenge at Less is More reminds me of when I started to craft, some thirteen years ago!  The art of Spirelli at that time was very popular, but it's not something that I've seen lately.


I started with a white card blank that I embossed two sets of parallel lines across.  Using my Stampin' Up! Scallop Circle and some black twine found in my stash, I made my flower.  A small button from Stampin' Up! Designer Subtles Collection finished this off.  The leaves were made using my Stampin' Up! Bird Punch.


The sentiment is from the Salutations Set by Paper Smooches.

Thursday, 24 October 2013

Sorry I had the hump with you !!

CASology challenge - Week 67: COUNTRY


I created a background for my "Country" card with Pebbles Inc. Pastel chalks. Using a mask I made a sand dune effect for my Camel. He is from the Zoo Crew set by Paper Smooches, and was coloured in with Promarkers.


The sentiment is computer generated, and cut out with my Sizzix banner die.

I then added a pierced border to the card using Stampin' Up! Paper-Piercing Pack Essentials, to compliment the piercing on the banner.